Loose gravel can undermine the look and use of driveways, paths, patios and garden areas. Ruts, stone migration, dust, weed growth and poor accessibility are common frustrations for homeowners and landscapers across the United Kingdom.
This article sets out how to stabilise loose gravel surfaces using effective, durable and eco-conscious methods. The aim is simple: increase surface cohesion, reduce migration and maintenance, preserve permeability where needed and improve safety and appearance.
There are three broad solution families to consider. Mechanical stabilisation includes compacted sub-bases, geotextiles and firm edge restraints. Chemical and resin systems cover resin bound gravel, resin bonded finishes and pour on gravel binder options that lock stones in place. Permeable systems are designed to meet SuDS principles while keeping water on the surface where appropriate.
Some approaches suit small pedestrian paths and decorative patios and are achievable for confident DIYers. Heavier-use areas such as vehicular driveways often need more robust sub-base work or professional installation from established firms such as theresinbondedslabcompany.co.uk.
Think of gravel stabilisation as an opportunity to create beautiful, low-maintenance, eco-friendly outdoor surfaces rather than merely fixing a problem. Later sections will explain why gravel moves, detail mechanical and resin solutions for binding stones, outline pour on gravel binder methods and compare DIY and professional routes to help you choose the right materials and suppliers.
Why loose gravel moves and what to consider before stabilising
Loose gravel looks simple, yet many forces act on a surface over time. Identifying why stones shift helps you choose the best way to stabilise loose gravel surfaces. Small tests and a clear brief for the area will save effort and money later.
Common causes of movement on driveways and paths
Poor sub-base compaction lets the gravel layer slump. Soft, organic soils and un-compacted fill are frequent culprits on older or DIY-laid drives.
Water runoff from heavy UK rains washes fines and small stones away unless drainage and fall are managed. Surface flow can undermine edges and create channels.
Repeated vehicle wheels and concentrated foot traffic push stones into ruts. These ruts then guide more movement and create uneven surfaces.
Freeze–thaw cycles make standing water expand beneath the surface. Seasonal wetting and drying change the profile and invite further migration.
Assessing site conditions for the right solution
Begin with a simple probe and visual check for soil type, gradient and drainage. Test for firm bearing where vehicles will pass.
Match the chosen system to intended use. Pedestrian routes can favour a lighter, decorative approach. Driveways need a stronger sub-base and a durable gravel binder for driveways and paths.
Check environmental constraints. Many councils prefer a permeable gravel surface system to reduce runoff. That requirement guides whether you pick a resin bound finish or a grid and binder combo.
Practical preparatory steps include clearing the area, locating buried services and measuring for materials. For complex slopes or weak soils, seek geotechnical advice.
Benefits of choosing a stabilisation method suited to the UK climate
Systems selected for local rainfall and freeze–thaw offer greater longevity and less upkeep. A correctly chosen approach resists washout and stone migration.
Stabilised surfaces improve safety, reducing trip hazards and giving firmer wheelchair and pushchair access. That matters for homes and public routes.
Permeable options support planning and sustainability aims. Using a suitable gravel binder for garden paths and patios or a permeable gravel surface system can help meet SuDS guidance and protect nearby drains and ditches.
stabilise loose gravel surfaces
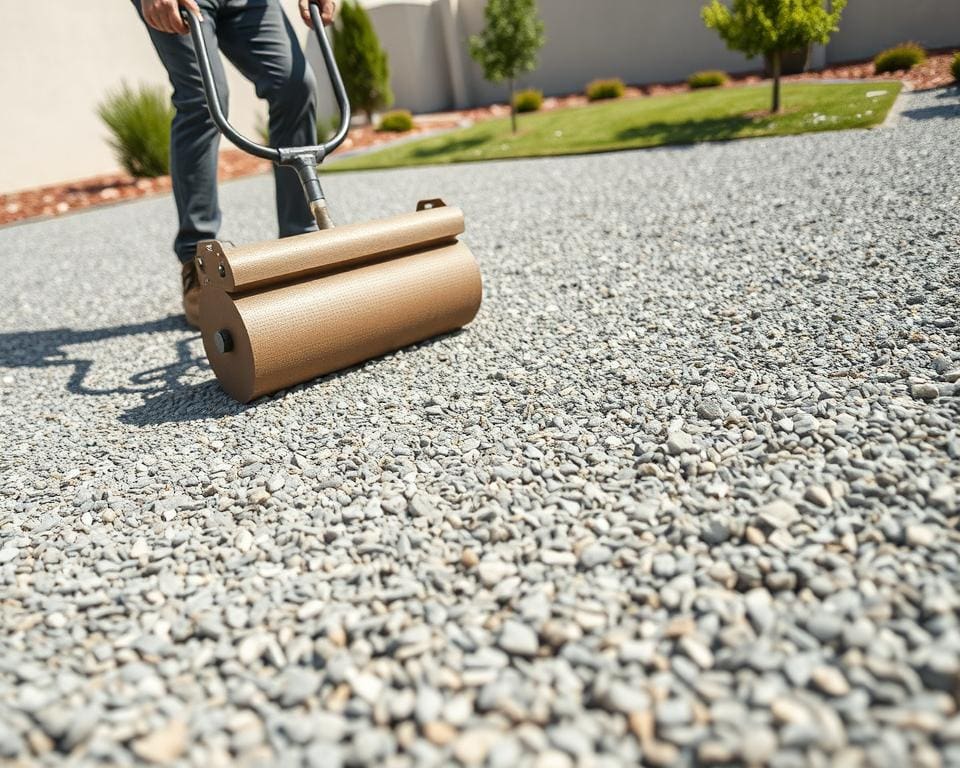
To stabilise loose gravel surfaces effectively you must match method to site and expected use. Start with a clear layered build and think about drainage, load and maintenance. Small repairs may suit a pour on gravel binder while larger areas benefit from more engineered systems.
Mechanical stabilisation options
Good mechanical preparation begins with a compacted sub-base such as Type 1 or compacted hardcore. This spreads loads and reduces settlement on driveways used by vehicles.
Geotextiles and geogrids stop fine subsoils mixing with the aggregate. They give lateral restraint and improve load distribution on weaker ground.
Edge restraints in concrete, stone, timber or metal hold the profile and prevent washout. Well-anchored edging reduces future top-ups and keeps the surface tidy.
Chemical and resin systems for binding stones
Two popular chemical approaches are pour-on binders and resin bound systems. A pour on gravel binder can be quick to apply for patch repairs and small areas.
Resin bound gravel mixes aggregate with a clear resin before laying. This method gives a seamless, permeable surface that resists dust and weed growth and provides a long lasting resin bound gravel finish.
Choose a resin solution for binding stones when you need durability and aesthetics. Resin bonded systems, where stone is broadcast into a tack coat, create a different look and tend to suit lighter traffic.
Permeable systems and eco-friendly choices
Permeable gravel surface system options help manage stormwater and meet SuDS guidance when correctly designed. Resin bound gravel performs well for infiltration while offering a neat finish.
Seek an eco friendly gravel binder solution with low-VOC resins and environmental product declarations. Certifications such as BBA provide reassurance about performance in the UK climate.
Cellular confinement grids filled with clean stone balance permeability and stability for gardens and patios. Use recommended stone sizes and follow resin-to-aggregate ratios for a consistent, long lasting resin bound gravel finish.
DIY and professional approaches to stabilising gravel for driveways and gardens
Stabilising gravel can be a satisfying weekend task or a job for an accredited installer. Small patios and narrow paths suit DIY methods when the base is sound. Large driveways, steep gradients and heavy vehicle use need engineered solutions from experienced teams.
Step-by-step DIY pour on gravel binder methods
Start by clearing vegetation and removing contaminated material. Check levels and provide a fall for drainage. A compacted Type 1 base or a stable existing surface gives the best result for a pour-on system.
Use angular, washed stone with minimal fines. Spread and compact the gravel so the layer is even and stable. Work only when the area is dry and ambient temperature fits the product instructions.
Mix the pour on gravel binder as directed. Apply in small sections, pour and rake or use a low-pressure sprayer to get uniform coverage. Allow the specified curing time while keeping traffic off the area.
Wear gloves and eye protection when handling chemical binders. Follow manufacturer guidance for ventilation and safe disposal. For tailored advice, refer to pour on gravel binder DIY on theresinbondedslabcompany.co.uk where technical datasheets and demonstration videos explain product-specific steps and recommended aggregate blends.
When to hire professionals like theresinbondedslabcompany.co.uk
Choose a professional when the project has complex gradients, a large footprint or will carry heavy vehicles. Accredited installers offer engineered sub-bases, precise resin mixes and quality control that reduce future repairs.
Professional teams can supply commercial resin bound gravel products and specialist aggregates not usually available to retail buyers. They also provide guarantees and, in many cases, insurance-backed warranties for peace of mind.
Cost, maintenance and expected lifespan
DIY approaches using a DIY gravel binder for landscaping give lower upfront cost. They may require more frequent maintenance and spot repairs over time.
Professionally installed resin bound gravel and gravel binder for driveways and paths cost more initially. They typically last 10–15 years or longer when maintained correctly. Routine tasks include clearing debris, weed control and occasional top-ups for loose stone.
Watch for signs that repair is needed: visible ruts, loss of bond, persistent ponding or widespread stone loss. Addressing small issues early prevents larger, more expensive reconstruction.
Choosing the right materials and suppliers for durable, attractive results
Select stone sizes and colours resin binders are compatible with to ensure a long lasting resin bound gravel finish. For smooth resin-bound surfaces, aggregates at 1–3 mm or 2–5 mm work best; larger decorative gravels suit resin-bonded or pour-on systems if the binder penetrates correctly. Ask suppliers for washed, kiln-dried samples and small panels so you can judge colour, texture and heat absorption in sunlight.
Specify a permeable gravel surface system if SuDS compliance or surface water management is required. Compare permeability rates (mm/hr) in technical datasheets and favour low-VOC, eco friendly gravel binder solution options where possible. Look for certifications such as BBA or ISO and request lifecycle information to check environmental impact and maintenance needs.
Vet installers by reviewing UK case studies and local references, including galleries on theresinbondedslabcompany.co.uk and similar specialist sites. Confirm membership of trade bodies and ask for written quotations, insurance details, warranties and maintenance guides. Visit a recent installation to see how materials perform in typical British weather.
Plan work for dry, mild weather and ensure correct drainage, edge restraints and fall to avoid washout. Aftercare is simple: regular sweeping, quick removal of leaves and following the manufacturer’s maintenance schedule will preserve permeability and the long lasting resin bound gravel finish for years to come.