Transforming cluttered cabinets into a streamlined kitchen starts with a clear goal: to make everyday cooking and entertaining easier. This guide shows practical steps to improve kitchen cabinet organization, boost cabinet efficiency, and maximize kitchen storage so you spend less time hunting for items and more time enjoying meals with family.
Well-arranged cabinets reduce meal prep time, cut food waste, protect cookware, and extend the life of pantry staples. Common pain points include hard-to-reach shelves, duplicate purchases from hidden food, and counters piled with items that belong inside. Solving these issues saves money and makes the kitchen feel calmer.
The article is organized into five clear sections: assessing and decluttering your current layout, smart storage hardware like pull-out shelves, organizational systems and labeling, and budget-friendly design upgrades. You can read straight through or jump to the section that matches your needs.
This piece is written for busy families, apartment renters, first-time homeowners, and anyone who wants a more joyful cooking space. The tone is encouraging: small changes often yield big results.
Start now with a quick checklist: clear a workspace, empty one cabinet at a time, set up trash and donate boxes, and take before photos to track progress. Many of the products and measurements discussed later are available at The Home Depot, IKEA, Target, and Amazon, and the solutions work for both new construction and older kitchens.
How can you organize your kitchen cabinets efficiently?
Start with a clear plan that turns clutter into calm. A quick cabinet layout assessment helps you see which zones work and which need change. Photograph each shelf, note what gets used daily, and decide where heavy or fragile items should live for safety and ease.
Assessing your current cabinet layout and usage
Begin by creating a cabinet inventory. Empty one cabinet at a time, sort contents into categories, and mark items by frequency of use. Place daily essentials at eye level or in lower cabinets that are easy to reach.
Map the kitchen work triangle—sink, stove, refrigerator—and assign cabinets near each station for the tools that belong there. Keep pots and pans by the stove and prep bowls near the sink or counter.
Decluttering: deciding what to keep, donate, or discard
Adopt simple criteria: keep items that work, that you use often, or that have real sentimental value. If a pan has a warped bottom or a nonstick surface that flakes, discard it safely.
Follow the one-cabinet-at-a-time rule to avoid overwhelm. Offer usable items to Goodwill or Habitat for Humanity ReStore, or list higher-end pieces on Facebook Marketplace.
Grouping items by function to reduce daily friction
Create clear zones: prep, cooking, baking, serving, and storage. Grouping items by function speeds up meal prep and keeps counters clear.
Use labels or visual cues so family and guests can return items to their proper place. Predictable placement reduces misplacement and stress.
Measuring cabinet dimensions for tailored solutions
Measure cabinets before buying organizers. Record interior width, depth, height, shelf thickness, and door swing clearance. Use a metal tape measure for accuracy and log numbers in a notebook or spreadsheet.
Check compatibility with popular products from Rev-A-Shelf, Simplehuman, and IKEA. Measure corner cabinets, toe-kick spaces, and upper cabinet heights when planning pull-outs, lazy Susans, dividers, or risers.
Smart storage solutions to maximize space
Small changes can unlock big gains in cabinet space. Start with options that improve access, protect fragile items, and make everyday tasks feel effortless. Below are practical choices you can mix and match to fit cabinets of any size and budget.
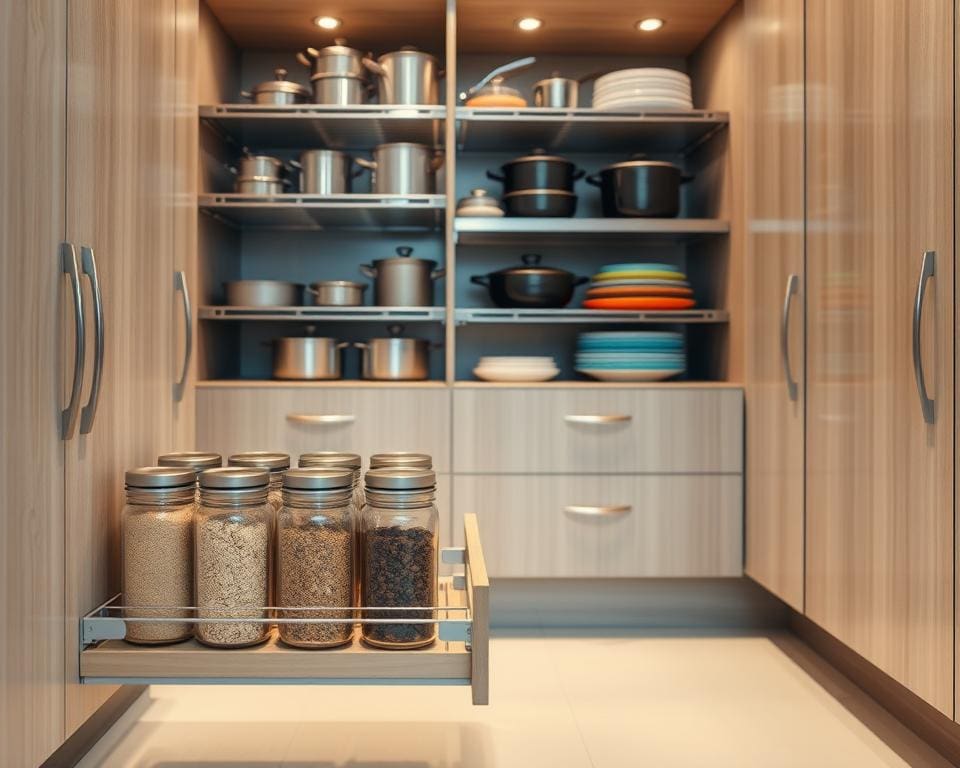
Pull-out shelves turn deep, dark cabinets into usable space. Brands like Rev-A-Shelf and Knape & Vogt offer models with soft-close slides and high weight capacities, so pots and small appliances glide out for full visibility. Measure cabinet depth and door swing; some installations are DIY-friendly, while a cabinetmaker can handle heavier, custom units.
Lazy Susan cabinets and kidney-shaped turntables revive corner spaces. A corner lazy Susan or a blind corner swing-out kit transforms dead corners into neat, reachable storage. These systems reduce crouching and searching, making spices, cans, and baking pans easy to retrieve.
Use vertical dividers to keep baking sheets, cooling racks, and cutting boards upright. Adjustable metal or bamboo dividers fit neatly into deep base cabinets or pantry nooks. IKEA and Bed Bath & Beyond sell budget-friendly options that prevent scratching and speed retrieval.
Place a small bin beside dividers for parchment, silicone mats, and liners. Fixed wood cleats provide a sturdy, low-cost alternative if you prefer a built-in look.
-
Stackable shelf risers double usable shelf height for plates, mugs, and canned goods. Clear acrylic risers keep items visible. Wire risers boost airflow for dishes that need to dry between uses.
-
Combine risers with modular bins from OXO and Rubbermaid to create neat, stackable zones. Check cabinet height and door clearance before installing to avoid awkward fits.
-
Avoid overloading top shelves to prevent sag and keep heavier items at waist height for safety.
Door-mounted racks free up shelf space for spices, wraps, lids, and cleaning supplies. Look at options from Rev-A-Shelf and Simplehuman or choose adjustable over-the-door organizers for a renter-friendly fix. These racks keep frequently used items in plain sight.
A magnetic knife strip clears counter space and drawers. Mount it away from a humid zone and at a safe height. Magnetic spice racks and small metal containers can hold measuring spoons and other metal tools, adding function without clutter.
For renters or quick swaps, use Command hooks, adhesive spice jars, and tension rods to test layouts without damaging cabinetry. Small, thoughtful investments yield cabinets that feel larger and work harder for you.
Organizational systems and labeling for long-term order
Start with a clear plan that makes daily tasks easier and keeps the kitchen calm. Choose storage that shows contents at a glance while creating a tidy, cohesive look. A consistent system cuts search time and makes restocking simple.
Choosing clear containers and uniform bins for visual cohesion
Pick clear pantry containers from trusted brands like OXO, Weck, or Mepal for airtight storage and easy identification. Glass jars work well for pantry staples because they resist stains and odors. BPA-free plastic offers a lighter option for high shelves or children’s zones.
Use uniform storage bins in matching sizes to improve stackability and give shelves a streamlined appearance. Fit shallow bins to front rows for spice packets and deeper bins for bulk items. Place square or rectangular containers where they fill shelf depth to avoid wasted space.
For more ideas on maximizing cabinet space with bins and pull-outs, consult a practical guide at what kitchen organisation ideas save the most.
Labeling strategies for pantry items, spices, and cookware
Choose label types that hold up to kitchen life: printed waterproof labels, chalkboard stickers, or labels from Brother and DYMO label makers. Keep fonts consistent and legible for quick scanning.
Include item name, use-by or expiration dates, and brief cooking notes such as “gluten-free” or cup-to-weight conversions for bulk bins. Place labels on the front faces of containers at eye level so everyone can read them easily.
Organize spices by alphabet, cuisine, or frequency of use. Combine a spice drawer insert or a tiered rack with clear labels to speed up meal prep.
Creating zones: prep, cooking, baking, and storage
Define kitchen zones by task to match natural movement. Keep knives and cutting boards near prep surfaces, oils and spatulas close to the stove, and measuring cups near baking pans.
Use uniform storage bins or small baskets to mark family zones for kids’ snacks and lunch supplies. Cross-zone consistency helps: store mixing bowls and measuring cups together even if they bridge prep and baking areas.
Place daily-use items within easy reach and reserve upper cabinets for occasional items. Thoughtful placement reduces motion and keeps the workflow smooth.
Maintaining order with routine checks and seasonal refreshes
Adopt a quick weekly reset of 10–15 minutes to return items to their homes and spot expired goods. Schedule a deeper seasonal kitchen maintenance every three to four months to reorder, reseal, and purge.
Repackage opened goods into airtight clear pantry containers to keep freshness and simplify visuals. Keep a simple pantry inventory on your phone or a magnetic notepad to avoid duplicates.
Rotate items with the seasons. Bring baking supplies forward in winter and swap lighter ingredients for summer staples. Update labels and zones as needs change so the system stays useful and inspiring.
Design tips and budget-friendly upgrades for efficiency
Start with clear cabinet design tips: prioritize accessibility, visibility, and logical grouping. Keep heavy pots and pans low, store daily items at eye level, and use consistent shelf heights so everything feels intentional. These small decisions lead to steady kitchen efficiency improvements that reduce time spent searching and reach for essentials.
For low-cost impact, choose budget kitchen upgrades under $50. Shelf risers, tension rods, stackable bins, adhesive hooks like Command strips, clear canisters from Target or Amazon, and magnetic strips for knives or spice jars are all affordable cabinet organizers that work instantly. DIY solutions also score high: repurpose wine crates as shelves, add simple wooden dividers, or upcycle a fabric shoe organizer for pantry door storage.
If you can spend $50–$300, mid-range investments make daily life smoother. Install pull-out shelves, soft-close drawer conversions, or modular pantry fittings from IKEA and The Home Depot. Add under-cabinet or motion-sensor LED lighting to improve visibility inside deep cupboards. These changes bridge cheap fixes and full remodels while delivering noticeable functional gains.
Reserve higher-end upgrades—refacing, custom cabinetry, built-in spice drawers, or appliance garages—when you plan to stay long-term or when access problems disrupt routines. Match finishes and hardware to your style but choose functional pieces like full-extension slides and soft-close hinges. Pick one cabinet, add one smart organizer, and watch small victories compound into a calmer, more efficient kitchen.