You’re about to start a small bathroom renovation and you want results that feel spacious, modern and practical. This introduction explains what to expect and how the article will guide you through stylish bathroom renovation choices without expanding the footprint of your room.
Renovating a compact bathroom can boost your home’s value and improve everyday comfort. Upgrading to efficient fittings reduces running costs, while thoughtful design makes a small space feel brighter and more luxurious. You’ll also gain better accessibility and longer-lasting finishes when you choose the right materials.
The article covers planning and assessment, realistic budgeting and prioritising improvements, and design strategies like colour, fixtures, storage and lighting. You’ll find practical small bathroom ideas, compact bathroom tips and step-by-step advice for bathroom remodelling UK projects, plus guidance on when to use a certified tradesperson.
This guidance is aimed at UK homeowners, private landlords and renovators working on en-suites, cloakrooms or family bathrooms. For technical work such as drainage or electrical installations, use qualified professionals such as NICEIC electricians or City & Guilds plumbers to ensure compliance with regulations.
Before you begin, write a clear brief, photograph the existing layout and measure carefully. Gather inspiration from trusted UK sources like Grand Designs and Ideal Home, and favour durable, moisture-resistant materials—porcelain tiles, Dulux bathroom formulations and chrome or stainless-steel fittings—to suit the UK climate and busy family life.
Planning a successful small bathroom renovation
Planning is the backbone of any small bathroom project. A clear bathroom renovation planning process helps you avoid costly surprises and keeps trades, timelines and budgets aligned.
Assessing your space and setting realistic goals
Begin with a thorough bathroom layout assessment. Take precise measurements: room length, width, ceiling height, waste pipe positions, soil stack, risers, door swing and window placement.
Sketch the room to scale or use simple apps such as RoomSketcher or SketchUp to visualise options. Decide the room’s function — cloakroom, family bathroom or en-suite — and who will use it, for example children or someone with limited mobility.
Note plumbing and drainage limits. Moving a toilet or bath may need rerouting soil pipes or altering joists, which raises costs. Check for load-bearing walls and floor strength before planning heavy fixtures. Set realistic goals: a cosmetic refresh, a mid-range reconfiguration or an ambitious full rewire and rebuild, each with different timelines and impacts on cost.
Establishing a budget and prioritising improvements
Set a renovation budget UK that fits your ambitions. Typical cost bands in the UK are: cosmetic refresh £1,500–£4,000, mid-range refit £4,000–£9,000 and high-end bespoke works from £9,000 upward. Local labour and material choices will affect those figures.
Prioritise the “big three”: plumbing and electrics, waterproofing and ventilation. Spend first on work that affects function and longevity, then on fixtures and finishes. Keep the existing layout where possible to save money.
Consider cost-saving options such as durable, budget-conscious brands like Triton or Mira for showers and Roca or Ideal Standard for sanitaryware. Shop with UK retailers such as Victoria Plum, B&Q or Wickes. Do non-technical tasks yourself only if competent.
Build a contingency of 10–20% for surprises like rotten joists, hidden leaks or plaster repairs. Ask for written quotes and compare suppliers to keep your renovation budget UK realistic.
Understanding building regulations and when to hire a professional
Bathroom work must meet building regulations bathroom standards. Electrical work needs compliance with Part P of the Building Regulations and BS 7671. Some jobs must be notified to building control or done by registered competent persons.
Hire a qualified plumber to move soil pipes, replace tanks or change shower systems. Use a Part P registered electrician for new circuits, heated towel rails or lighting. Consult a structural engineer for wall or joist alterations.
Find vetted trades through the Federation of Master Builders or Checkatrade and get written contracts, timescales and guarantees. Approved installers often offer warranties and handle building control notifications when work affects drainage or structure.
Design ideas to maximise space and style
Start with a clear vision for how you want the room to feel. Smart small bathroom design uses colour, fixtures and storage to make the space work harder while remaining stylish.
Choosing colour schemes and finishes that open up the room
Pick lighter, cooler tones such as pale grey, soft blue, cream or off-white to reflect light and create a sense of space. Use high-value contrasts in small doses to add depth without crowding the visual field.
Large-format tiles with minimal grout lines make surfaces feel continuous. Consider vertically stacked subway tiles to lift the eye and matt floors for slip resistance with satin or gloss wall tiles to bounce light.
Choose moisture-resistant materials suited to the UK climate: porcelain, glazed ceramic and waterproof laminates. Use anti-mould grout and silicone sealants, and select paints like Dulux Bathroom+ for durability.
Mix textures to add warmth without clutter. Terrazzo-effect tiles and matt black or brushed brass fittings are on-trend. Classic chrome remains a safe long-term choice.
Space-saving fixtures: shower enclosures, wall-hung toilets and compact basins
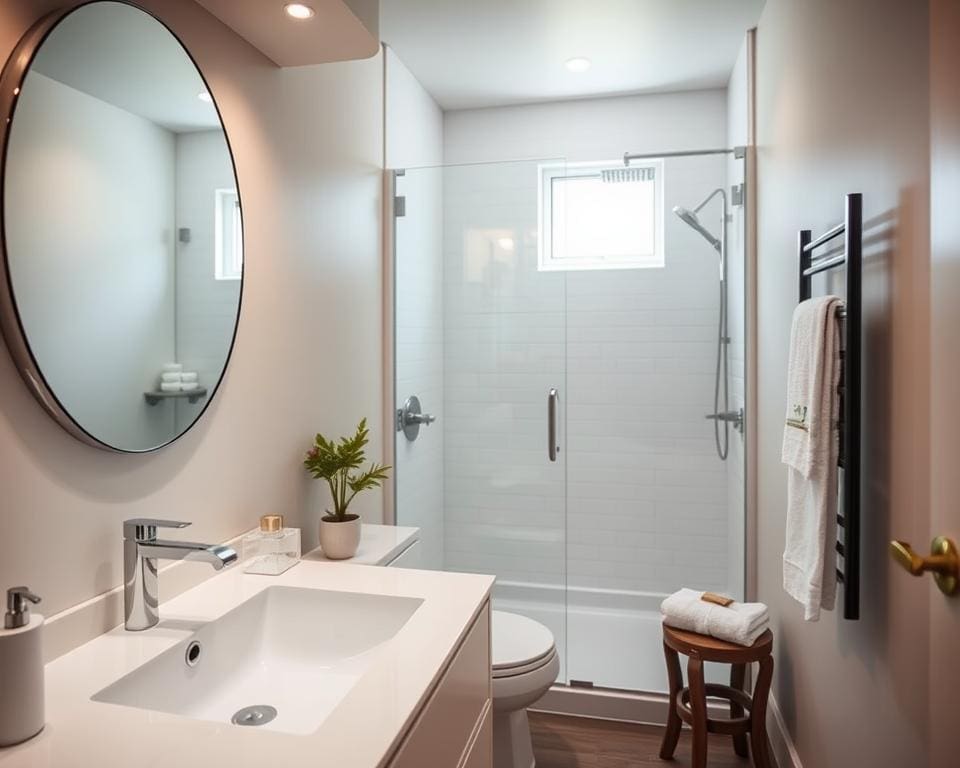
Quadrant and corner shower enclosures work well in cloakrooms. Sliding or bi-fold doors save space compared with hinged doors. If budget allows, a level-access wet room with a linear drain gives a seamless, modern feel.
Wall-hung toilets with concealed cisterns free up floor space and make cleaning easier. Where wall-hung is not possible, look at back-to-wall or compact close-coupled models from brands such as Ideal Standard, Roca and Duravit.
For basins choose corner, semi-recessed or slimline vanity units that combine wash space with storage. Shorter shower-bath combos or over-bath screens add multi-functionality in very small plans.
Storage solutions that blend with your design
Recessed medicine cabinets and in-wall niches save protruding storage and keep sightlines clear. Ensure recesses are tanked and sealed for wet areas.
Vanity units with integrated storage hide toiletries and plumbing. Mirrored cabinets do double duty as storage and reflective light sources. Look at modular ranges from John Lewis, B&Q or IKEA for adaptable sizes.
Use tall, slim cupboards and ladder-style towel rails to exploit vertical space. Hooks, magnetic strips for small metal items and baskets keep essentials organised without cluttering surfaces.
Select moisture-resistant cabinetry such as marine-grade ply, laminate or PVC-faced MDF. Choose hardware rated for bathrooms to avoid corrosion and warping.
Lighting strategies for function and ambience
Layer lighting for flexibility. Combine ambient ceiling fittings, task lighting at the mirror and accent lights in alcoves to create depth and control.
Fit lights either side of the mirror or choose an illuminated mirror at head height to reduce shadows. Use LEDs with a CRI of 90+ for accurate colour rendering when applying make-up or checking skin tone.
Observe zones and IP ratings: use IP44 fittings near water and follow Part P for wiring. Choose LED fittings and dimmer switches to manage mood and save energy. Fit extractor fans with humidity sensors to protect finishes from condensation.
- Prioritise a cohesive palette and durable finishes.
- Choose space-saving bathroom fixtures that match scale and style.
- Use clever bathroom storage ideas to keep surfaces tidy.
- Apply bathroom lighting tips to balance task and ambience.
Practical tips for implementation and finishing touches including small bathroom renovation
Plan the project in clear phases and set a realistic timeline. A typical small bathroom sequence is strip-out (1–3 days), major plumbing and electrics (2–5 days), plastering and dry lining (1–3 days, plus drying), tiling and floor finishes (3–7 days), fitting fixtures and painting (2–5 days), then snagging and commissioning (1–3 days). Remember lead times for specialist items such as custom vanities or bespoke shower doors can extend the schedule, so factor those into your calendar.
Agree a written schedule with your bathroom contractors and link milestone payments to completed stages. Use photographs or signed handovers at each stage and confirm who is responsible for site protection, waste removal and cleaning. This approach reduces disputes and keeps the job on track.
Waterproofing and correct tanking are essential in wet zones; use reputable systems such as Wedi or Schluter Kerdi and ensure installers have relevant experience to avoid leaks and insurance problems. Check floor joists and subfloor strength before installing heavy stone thresholds or wet-room finishes, and choose levelling compounds rated for wet environments.
Size ventilation to the room volume and aim for an extract rate of at least 15–30 litres/sec for typical bathrooms. Consider overdoor fans or continuous trickle ventilation if needed. Pair an extractor with a heated towel rail sized to provide drying and top-up heat—look for Eco-design compliant electric models or water-fed options connected to central heating.
For finishing touches bathroom style, select cohesive towel palettes, non-slip mats and matching hardware to elevate the look. Oversized mirrors or multiple reflective surfaces will amplify light; a small shelf or ledge makes a neat display for curated toiletries or humidity-tolerant plants such as spider plant or Boston fern. Use trim, grout colour or a feature tile as an accent—contrasting grout on white tiles gives a graphic finish.
Practical maintenance will protect your investment: apply easy-clean grout sealers, choose anti-limescale showerheads and fit accessible service panels for concealed cisterns. Keep a short checklist: check seals annually, clean extractor filters, inspect grout and reseal silicone around wet areas as needed.
At final commissioning, test all installations for leaks, hot-water performance and correct operation of extractor and lighting. Obtain manufacturer warranties and installers’ guarantees, and keep manuals, certificates and as-built photos in a single folder. Live with the layout for a few weeks before minor adjustments and log snagging items for the contractor to address within the agreed defect period.
These bathroom renovation tips UK, practical small bathroom finishing ideas and attention to bathroom finishes will help you steer the project confidently. Work with reputable bathroom contractors, prioritise waterproofing and ventilation, and use considered finishing touches bathroom to make a small space both durable and stylish.